IKEA HACK- MALM DRESSERS
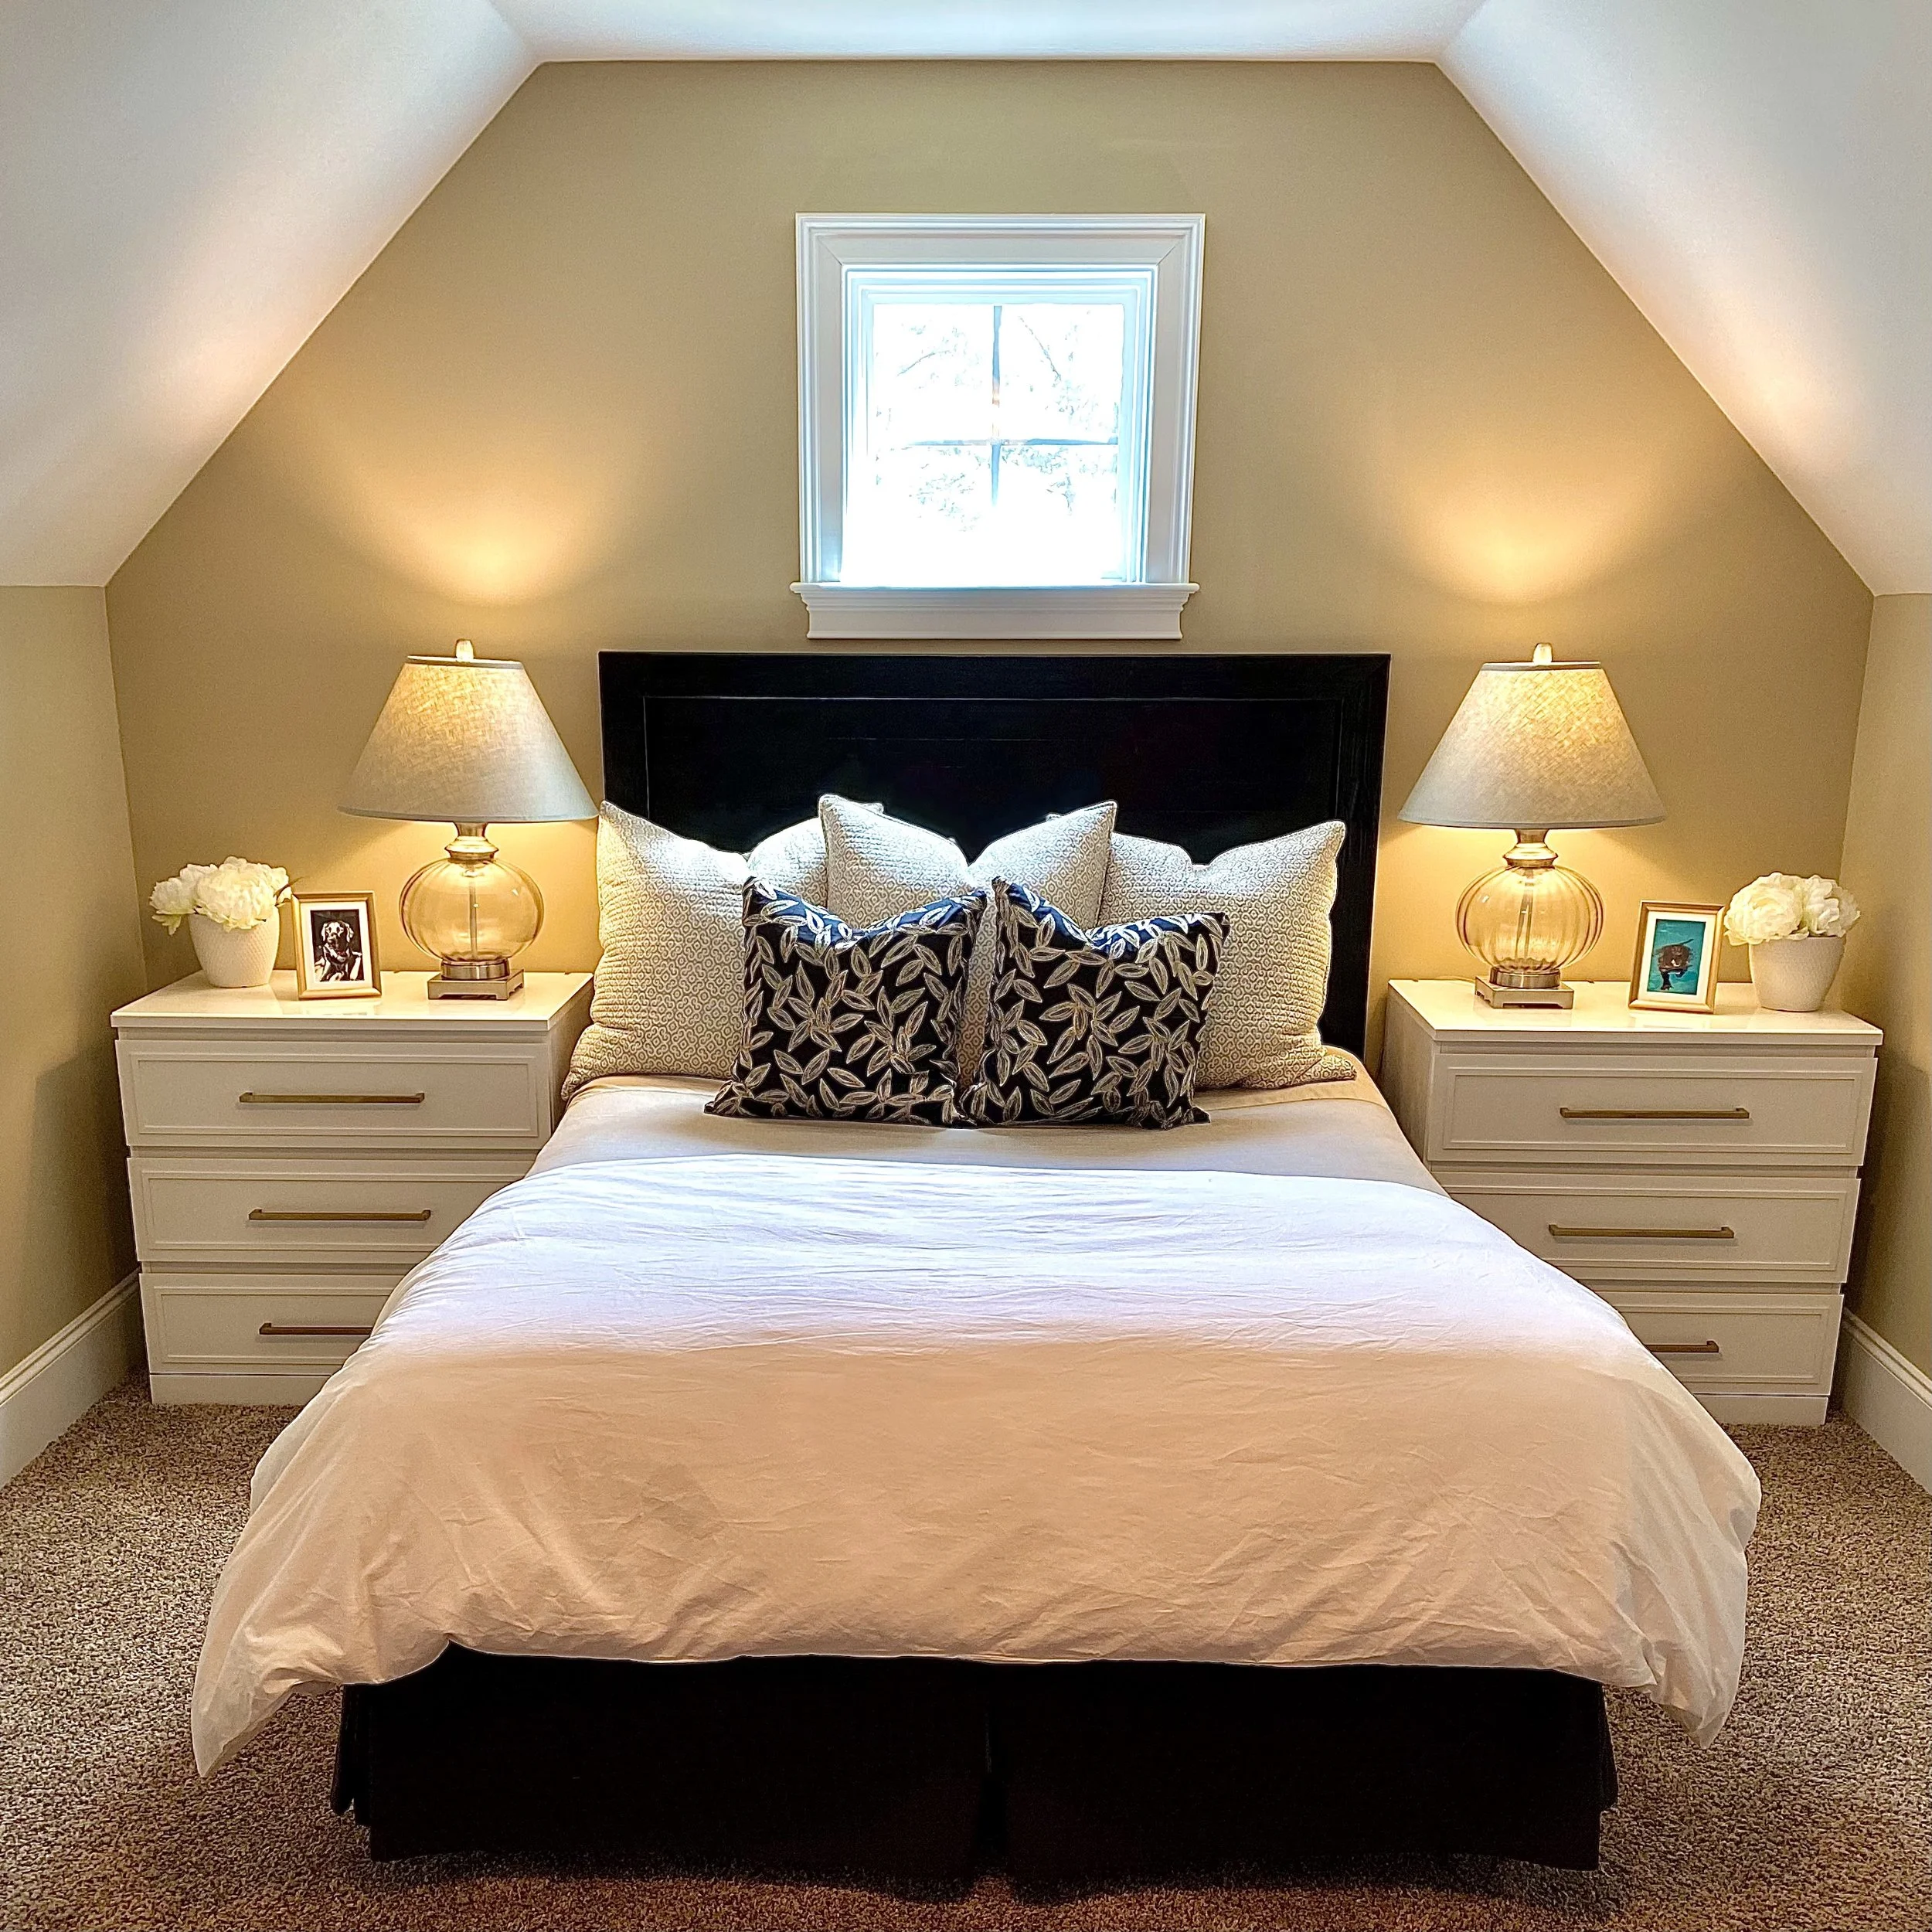

So, my IKEA kick continues. I updated two IKEA MALM dressers to make them nightstands for the guest room/playroom project. Again, as a novice DIY-er, I am very proud of how they came out and I learned quite a bit. And as nightstands, they have so much storage!
**Please always remember to secure furniture to the wall for safety.
Here are the materials I used:
IKEA MALM dresser, white ($79.00) (linked here)
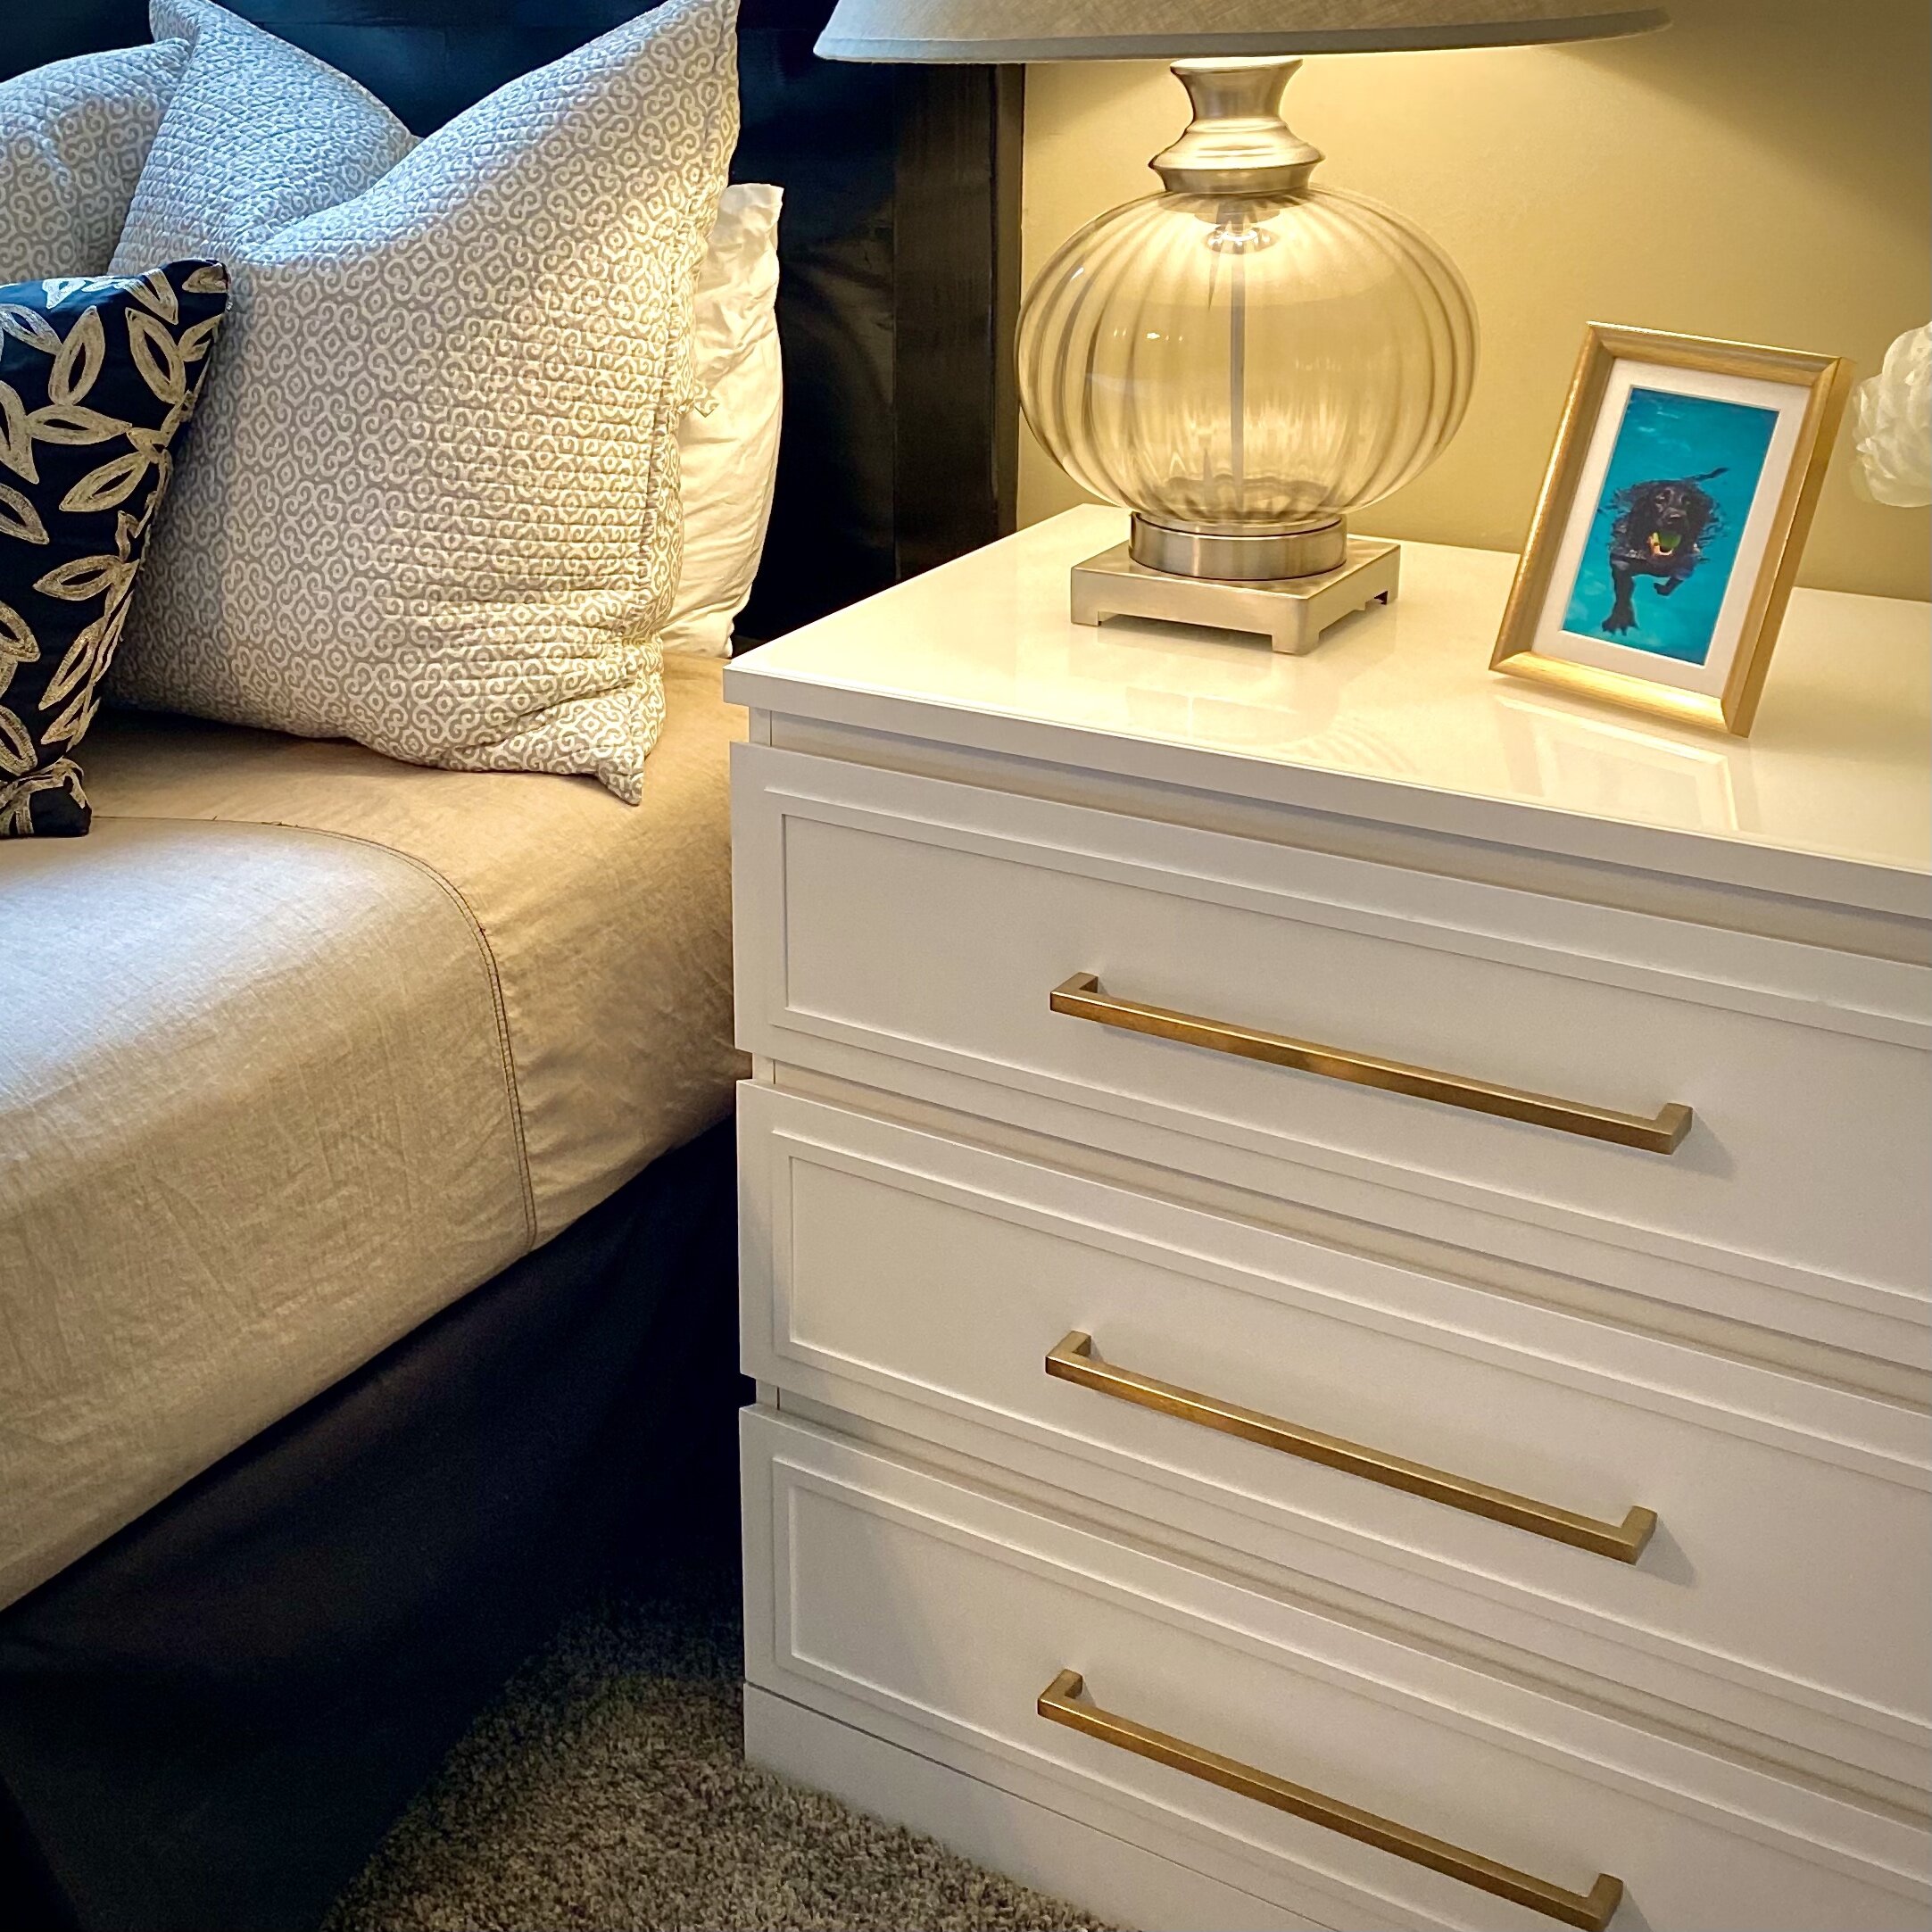
IKEA MALM glass top, white ($19.99) (linked here)
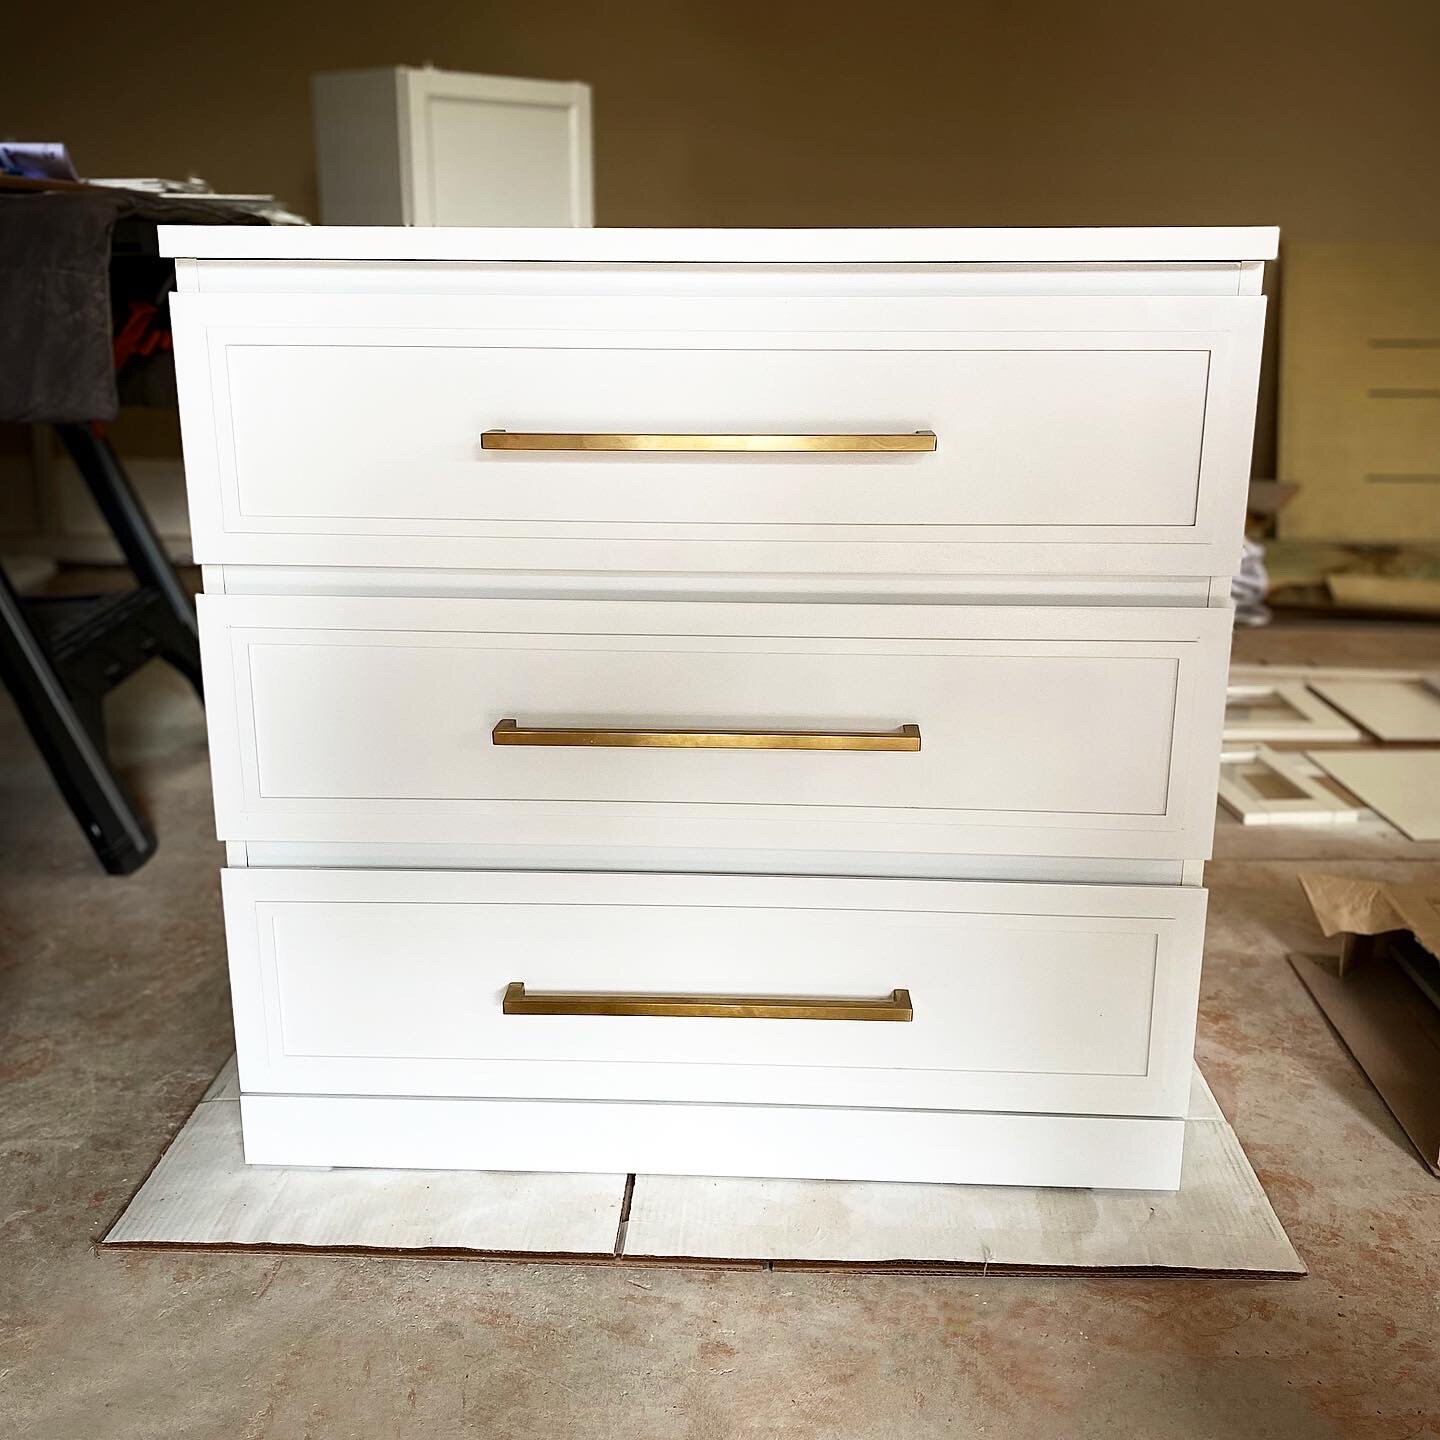
O’verlays Rex Kit, 1/8 in. ($29.95) (linked here)
Brushed brass drawer pulls, 13 in. ($46.99, 10 pack) (linked here)
Liquid Nails (linked here)
Here is the process I used:
Primed and painted the O’verlays. I used spray paint because it was easier and I had some on hand.
**The white of the O’verlays does NOT match the IKEA white. I chose to try to paint the entire dresser, drawer fronts, and O’verlays. I watched a dozen videos on how to paint IKEA furniture and read a lot of how-to websites. It is not that easy. I sanded, primed, and painted, and it is a very difficult surface to paint. However, I used the glass top, which has a white opaque underside so you cannot see the top of the dresser, and the way mine are used as nightstands, you cannot see the sides. SO even though my paint job is not quite as great as I would like it to look, the drawer fronts look great.
I sanded, primed, and painted the dresser and drawer fronts. (I did all of this before assembly!)
I added the O’verlays to the drawer fronts. This required precision and a million measurements to line up the O’verlays perfectly on the drawer front. The instructions that come with the O’verlays and on their website are super straightforward. Oh, by the way, Liquid Nails is liquid gold!
**Note- I glued the O’verlays after I assembled the drawers. The O’verlays are a softer material and I did not want them to get damaged in the assembly process. And a side note to my side note- I read on their website that you can fix any dents in the O’verlays using the heat from a hairdryer!
I added the drawer pulls to each drawer. Measure. Check. Measure again before you drill.
**I also used a quick little trick! I used a piece of painter’s tape (the length of the holes for the hardware), placed it on the back of the hardware, and poked a hole through the top or bottom edge of the tape where the holes are. Then, I placed the tape on the drawer front, made sure the measurements were correct and the tape was level, and marked the holes. Make sure to measure again, and then drill.
After inserting the drawers, I attached the glass top to the dresser according to the IKEA instructions.
CRITICAL STEP- Attach the IKEA MALM dresser to the wall according to the IKEA instructions. These dressers can easily tip over if not secured to the wall. IKEA provides the hardware to attach the dresser and the IKEA instructions are simple and straightforward.