
IKEA HACK- MÅLA EASEL


This project was incredibly simple and quick! This is part of a bigger project I am slowly but surely working to complete. I wanted the easel to match the IKEA Lätt children’s table project (linked here) in hopes of having a cohesive play room in the near future. It came out really cute and gave me the idea to make a dormer window space of the play room a little are nook! (Stay tuned for the finished room…)
Here are the materials I used:
IKEA Måla Easel - $19.99 (linked here).
Gold spray paint - $5.30 (I used Rust-oleum Metallic gold, linked here).
White spray paint with primer - $6.76 + I used two cans because I sprayed the back of each side (linked here).
Painter’s tape - $5.64 (linked here).
(Note- I had the painter’s tape and gold spray paint from my other project, which reduced the cost of this project. I wanted to try the white spray paint to see if I liked it, otherwise I would have used leftover white paint.)
Here is the process I used:
SPRAY HARDWARE. I used the gold spray paint to spray the easel tray and all of the hardware, including the plastic hinges (two coats worked well).
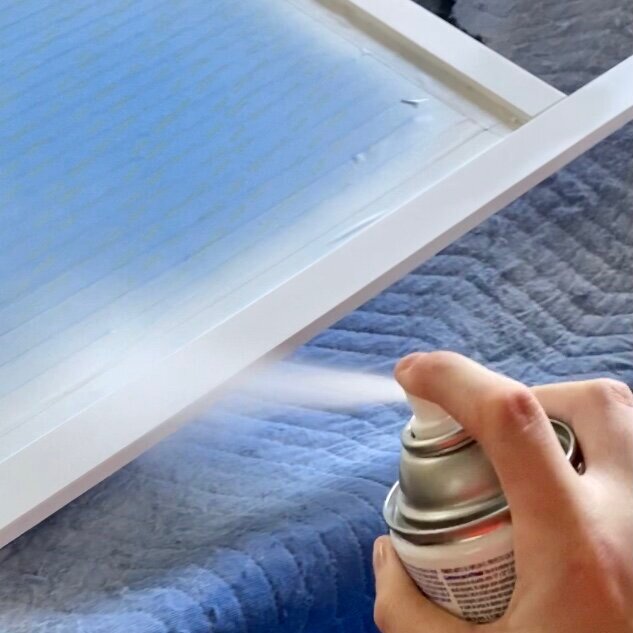
TAPE. Before painting the easel, I used painter’s tape to block off the chalk board and the white board. I taped the edges of the boards, and then taped off the entire space of each board, leaving only the wooden edges and legs exposed. I did not tape the backside of the easel, and I ended up spray painting the entire back sides all white.
SPRAY PAINT. Because the spray paint I used was a paint and primer, no priming necessary. I did two light coats of spray paint on the front and back of each side. The spray paint was incredible easy and quick. Remember to put the pieces on top of cardboard or plastic to avoid getting residual spray paint all over everything. Also, be sure to follow the dry times listed on the can. (Side note- I loved using spray paint for this project. No brush strokes and it was so quick.)
ASSEMBLE. I assembled according to IKEA’s instructions and voila! Done!
